

Foundational Areas
Having used Bubble for years, both building apps and serving over 150 clients, there are certain foundational areas we've found to be needed in achieving high proficiency.
The below foundations are not a comprehensive list, although once mastered, one will be able to figure out most other issues that popup during no-code development.
Before you get started, learn why Bubble.io is the best platform to build your no-code web application among all the no code tools out there in the market today.
Foundations
Building an app in the Bubble platform is relatively linear. Meaning the process typically goes as follows:
- Designing and Implementing the Database Structure
- Designing the UI (frontend) of the app
- Configuring and connecting the workflows between UI elements and the database
- Implementing data security
With that said, here are the high-level foundational aspects you must master before becoming proficient in Bubble app development.
- Database Design & Structure
- UI Elements & General Editor Navigation
- Workflows & Application Logic
- Data Security
- Conditionals & States
- Bonus: APIs
We'll cover each one in depth below.
Database Design & Structure
In order to really get started with Bubble.io, you need to understand how relational databases work and how they translate into Bubble. If you're entirely unfamiliar with relational databases, you should head over to youtube and dedicate 5-15 minutes on this.
In Bubble, there are 1) Data Types and 2) Data Fields.
Data Types refer to 'tables' in your database. For example, if your app allows users to post information about their car, you would have a table called Car, with all relevant fields.
Data Fields refer to 'fields' within a Data Type. For example, if you had the Car table as referenced above, a Data Field would be something like Color, Year, Brand, etc. The Data field describes, or is a unique factor in describing a car.
Think of Data types as blueprints. In this scenario, the Car would be the blueprint, and the various pieces of information are all data fields.
Key to learn: The difference between data types and fields as they relate to Bubble. Try recreating various scenarios or well known apps (Facebook, Twitter, etc.), to understand how to layout the database. Becoming proficient in database design is the most important aspect of Bubble and no-code app development. We have countless bubble.io examples of apps that hurt themselves long-term with bad database design.
Relational Linking
When it comes to database design, you need to factor in proper structure, security, and performance. Here's a little info on each.
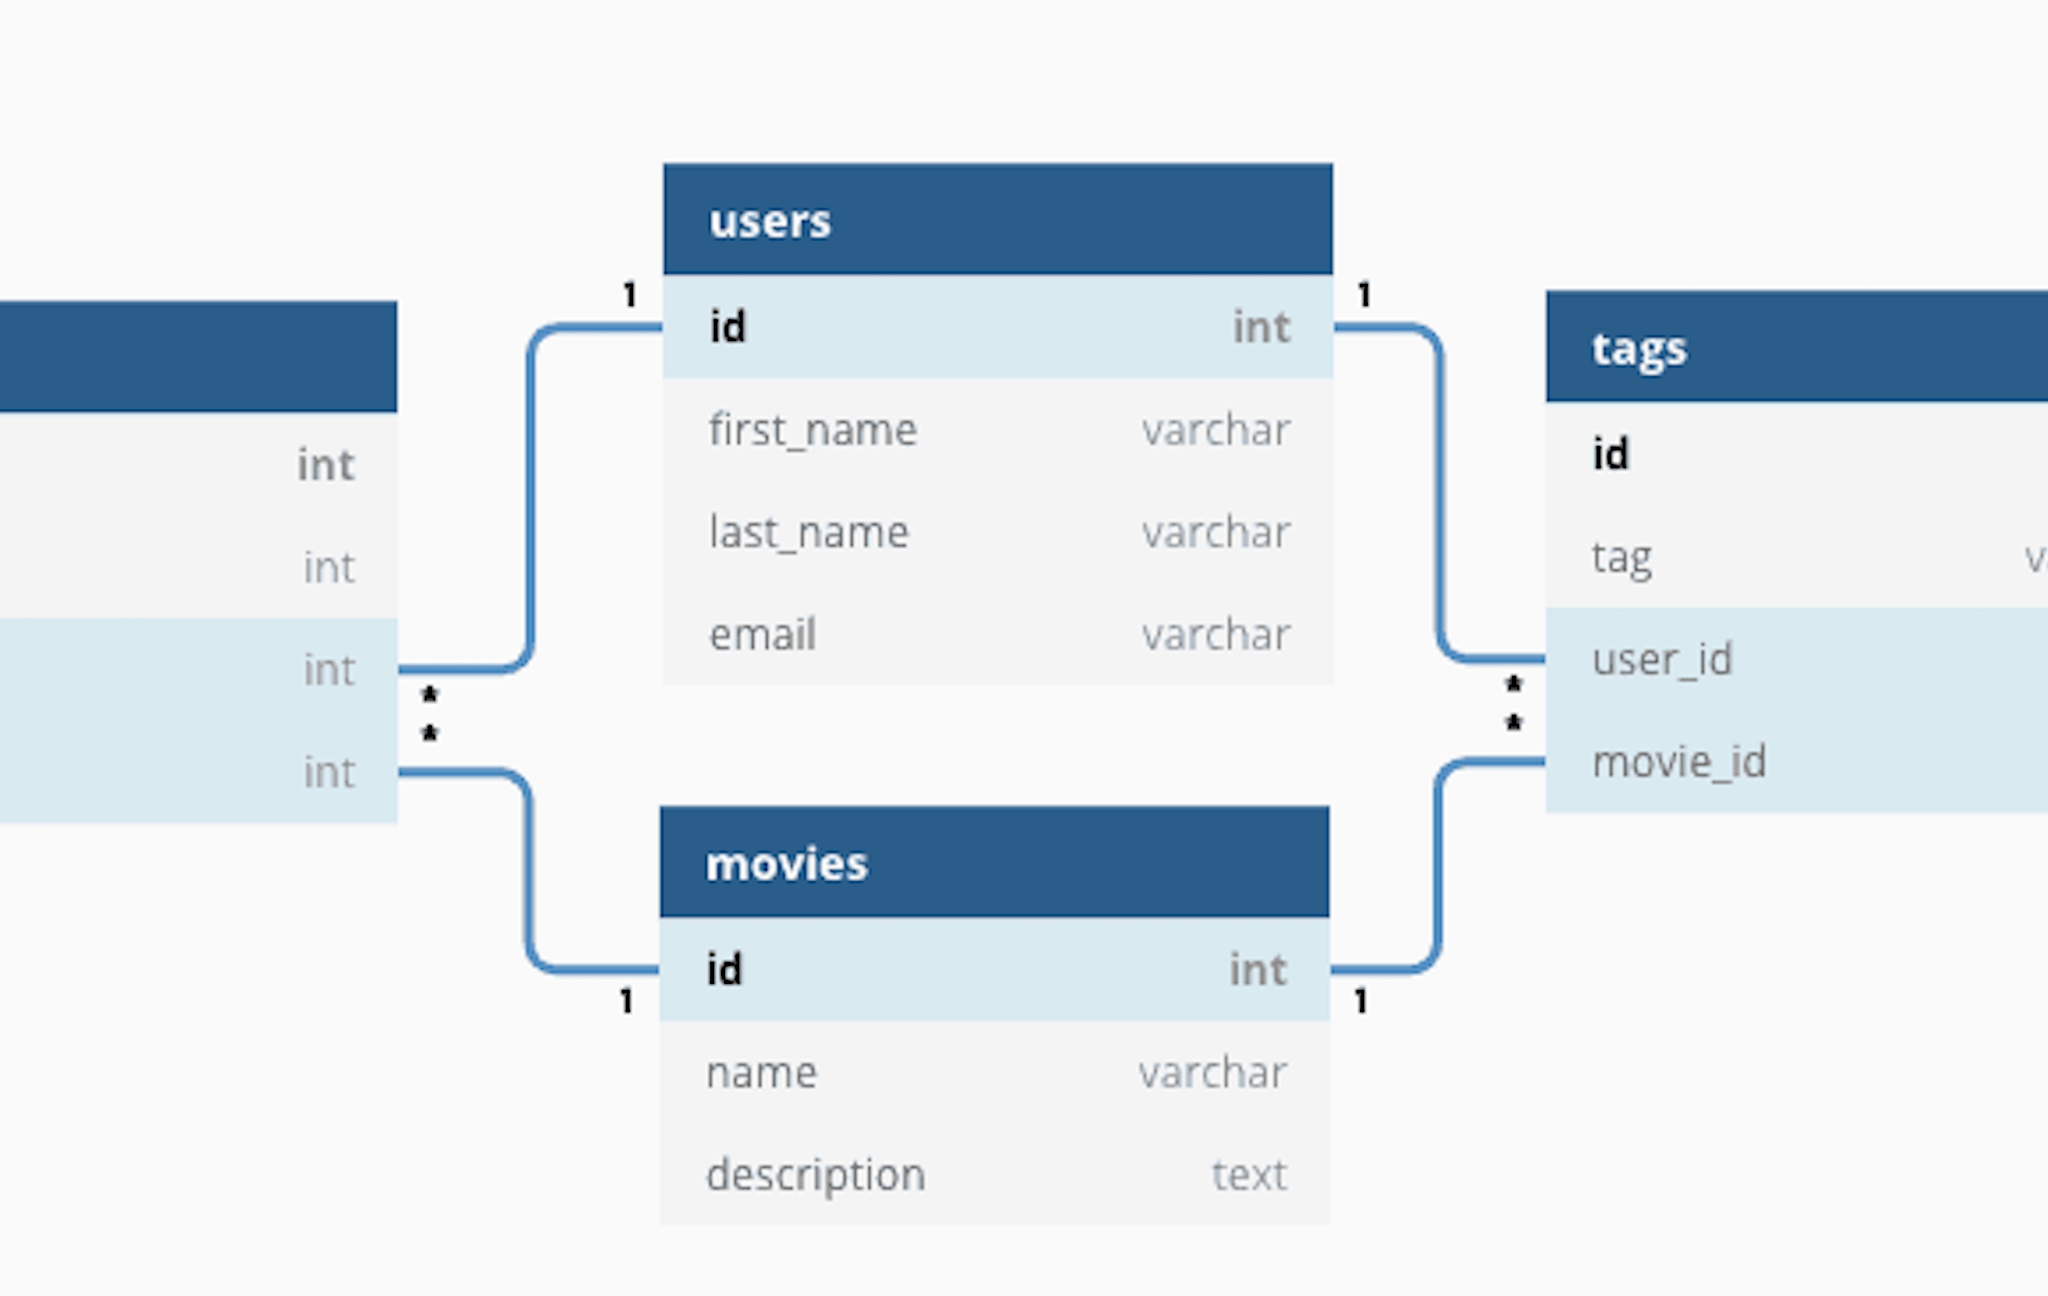
Proper Structure: Understand how to properly link data types. For example, if users are able to upload information about their cars, you would want to add a data field under the User Data Type which is a list of cars. Now, your app can easily search for cars that are linked to a specific user.
Security: You should take security into factor when building your database schema. For example, a user might only need to see cars that they uploaded, not others of other users.
Performance: The most important of the three, you surely, definitely, positively(!) want to factor in performance when building your database schema. Let's use one quick example to emphasize our point. Say in total, 10,000 cars have been uploaded to your app. If a user wants to search for only cars created by them, having to search through all car records would be a strain on your database. This is where relational linking comes into play.
You have two ways to search for Cars:
- Searching through all Cars in the Car Data Type where created by = current user
- Retrieving all cars associated with the Current User.
In Option #2, you would have a Cars Data Field under the User Data Type, which would be a list of cars. Now in your search, you would just bring back the Current User's cars, instead of having to search through 10,000 records.
Key to Learn: How relational database linking would look like for your app, factoring in things such as security and especially performance. Try thinking of the features you're building, and how the performance of Database searches would affect your Database schema.
UI Elements & General Editor Navigation
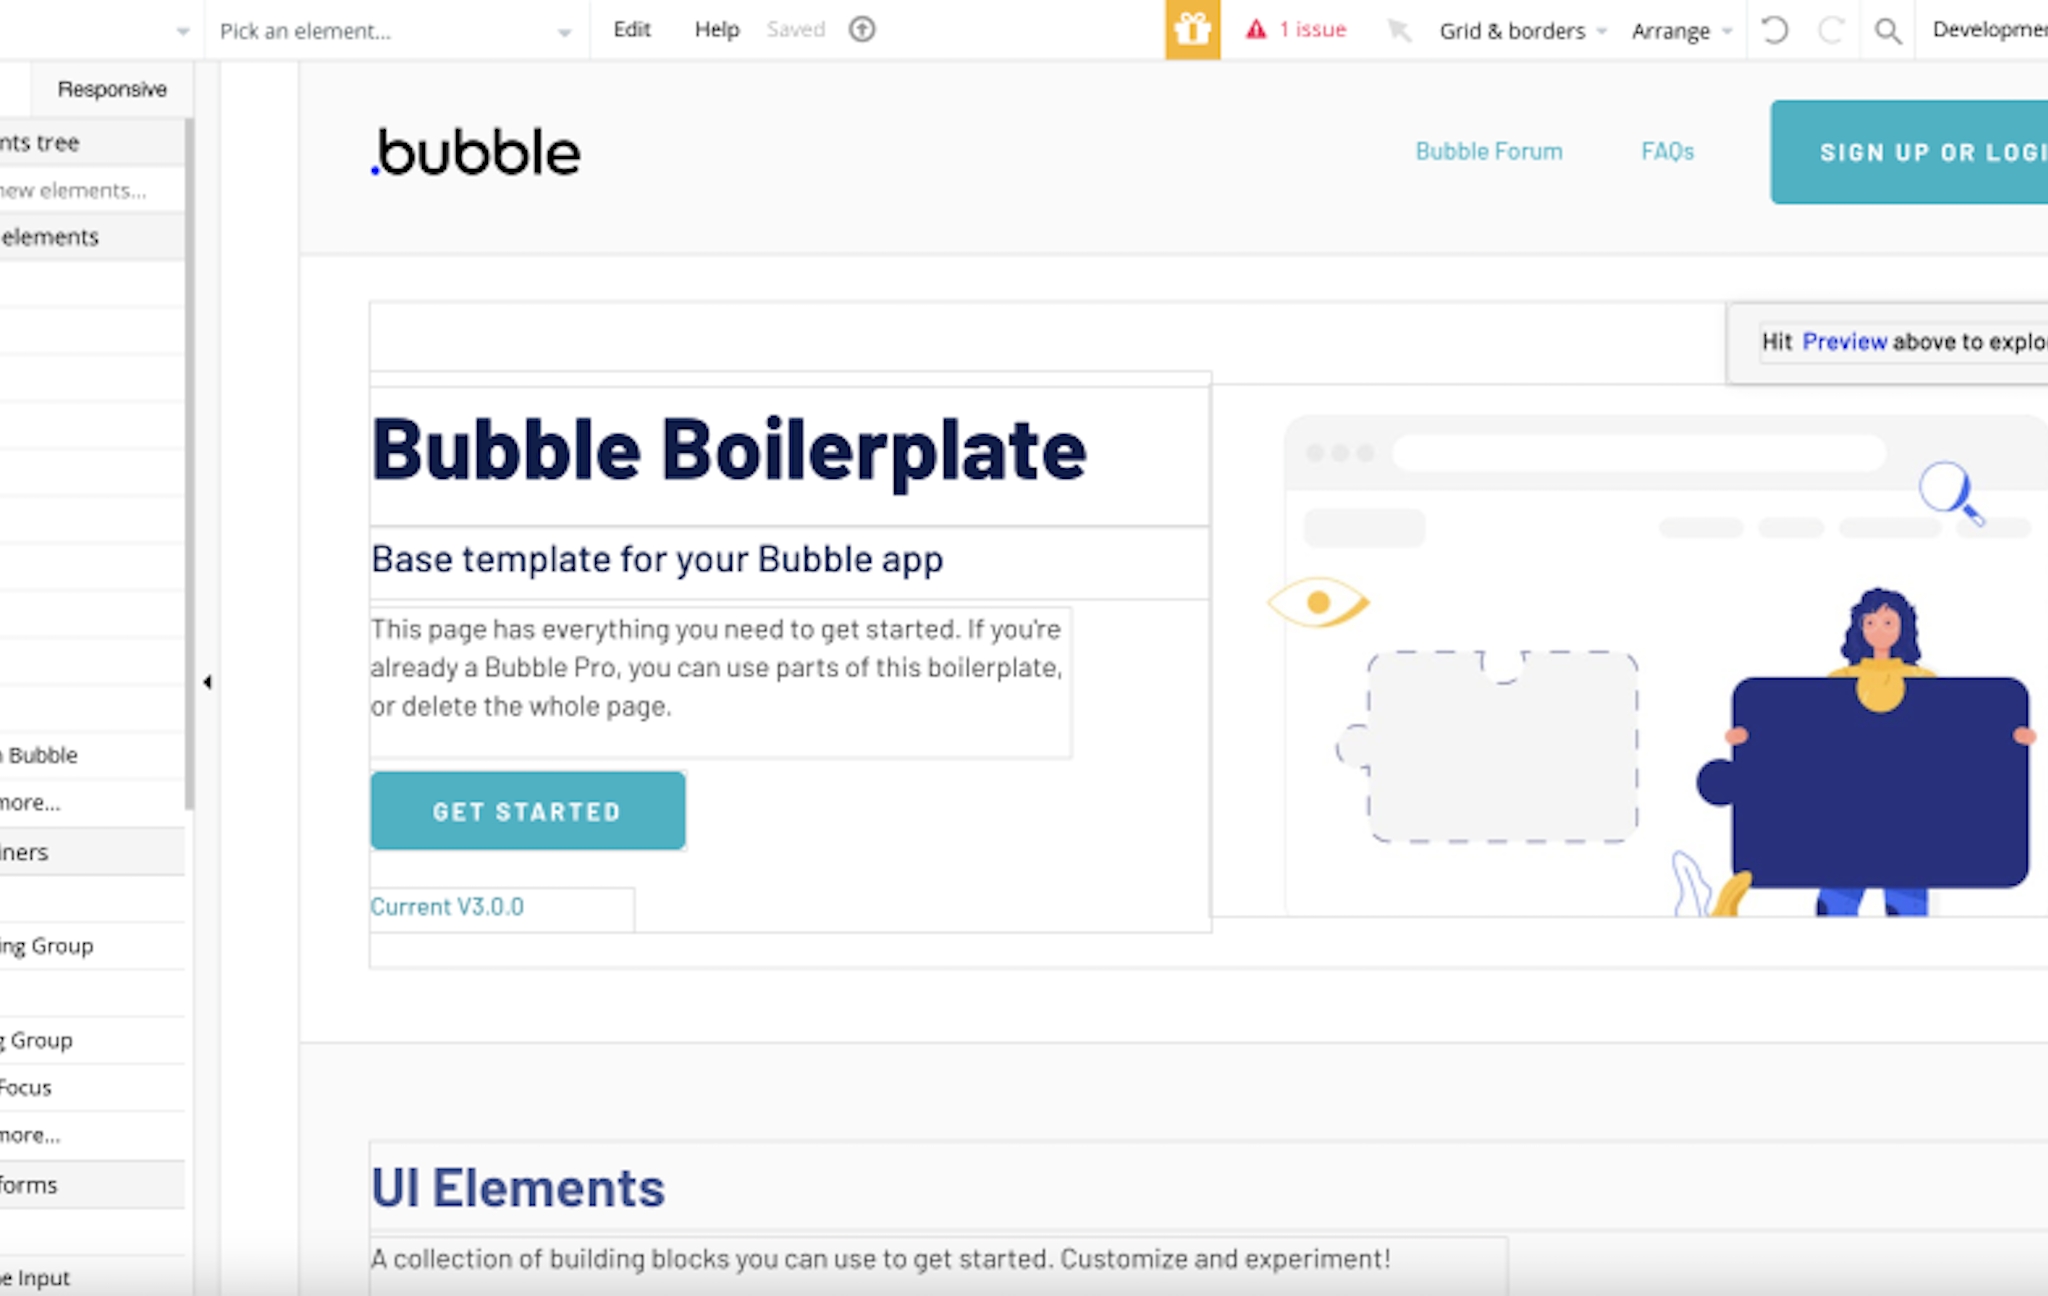
A generally overlooked aspect of Bubble.io is the general editor, layout, settings, and UI elements.
Let's take a look at each, and outline our recommendations.
Editor, Layout, Settings: You'll want to spend some time just playing around with the editor. Anything you do in Bubble can be undone and restored, so don't get scared to mess anything up. Generally speaking, you'll want to get a good grasp of where everything is, what it does, and how to use Bubble efficiently. We're not going to outline much about the editor as you should just take a look and play around to learn best.
UI Elements: Super important here. You want to know more than what an element is, and more-so all the underlying aspects and changes you can make on each. For example, it's great to know what a Repeating Group is, but do you know how to use it, and use it well? Our recommendation here is to go through every Bubble-offered element one-by-one, add it to your page, and play around with it. Understand how to style them, change sizing, and most importantly, bring data back.
One key note about UI elements. You'll need to understand how elements can hold or retrieve data. For example, you can have a group (container) with multiple elements inside. For the group, you can set the data to hold information about a data type (for example a Car). Then, all of the elements inside that group can use the data provided by the group.
Understanding how data is stored and retrieved in respect to UI elements is especially important.
Key to learn: General Bubble navigation and editor. Get comfortable with the layout and where everything is/all the tools provided to you. Next, play around with the UI elements and try fetching data with groups/repeating groups and other elements.
Workflows & Application Logic
The meat of the app, in essence, are your workflows. Here, you're defining all of the application logic and certain actions that should run. The easiest example would be when a user clicks this button, do this.
As simple as it sounds, this is how you should look at workflows. When a specific condition has been met, the system should do X.
Here's how we attack workflows:
- Lay out what element or condition starts the workflow
- Decide what should happen in the workflow
- Understand how it impacts the database
- Lay out how the system/app should respond to the workflow
Let's use one example to lay out the workflow:
When a User clicks the "Submit Bid" button, the System should create a bid for the specific car, email the car owner, and add the bid to the relevant User & Car Data Types. The User should then be taken to the bid info page.
In Bubble, the workflow would look like:
- Create a New Thing (Bid) - assign relevant data fields
- Make changes to thing (User) - add bid to List of Bids (for originating User)
- Make changes to thing (Car) - add bid to List of Bids (for the Car that received the bid)
- Send Email - to Owner of the Car's email
- Navigate to Page -> Bid Info - Data to send would be the newly created bid
While this is just one example of a workflow, it's best to try and emulate popular workflows across apps to really learn.
Key to learn: How workflows are built, the different types of actions, how to associate workflows with database changes. It's extremely important to understand how your database needs to change based on a workflow. Bubble developers generally skip this step when learning, which is really important as you learn every workflow and action logic available to you.
Data Security
Without proper security, people will be able to look into your app and view data that may be compromising. It's incredibly important to get data security right.
In Bubble, you'll notice your security settings in the 'Privacy' tab. Here, you'll create privacy rules for each Data Type that you have in your database. Some Data Types might be open to anyone, but some you'll most likely want to have secured.
Let's take a look at an example. As always, let's say you have an app where users can upload Cars and receive bids on them. Let's take a look at both Data Types, Cars and Bids.
Cars: Generally speaking, if people are bidding on cars, they should be viewable to everyone. In that case, you can limit the Car data type to anyone who is logged into your app, or even anyone regardless (they don't have to be logged in).
Bids: Probably more confidential, you may want to reduce visibility on a bid to only the person who submitted the bid OR received it (for their car). In this case, you'd want to create roles for these scenarios, and remove access to everyone else.
When creating privacy roles, you should look at the Data Type privacy setting as the base settings for one particular instance of the Data Type. So for a bid, your role could be "CreatedBid" = This Bid's Creator = Current User .. or "BidToOwner" = This Bid's Car's Creator = Current User. In the two roles mentioned, these would apply for any instance of a bid.
Lastly, you'll want to create roles for every scenario. For example, you may want to add a role as "Admin", where if the User is an admin, they should see everything. Same thing goes for Regional Managers, Managers, Employees, etc.
Key to learn: How to create privacy roles and limiting data to certain users. Understanding which Data Types should receive roles while others remain open.
Conditionals & States
The power of Bubble comes into play here. Conditionals and States allow your app to be exponentially more flexible. For example, you may want your app to look differently on web versus mobile web browsers. This is where conditionals and states come into play.
Conditionals are scenarios where if a certain condition is met, certain actions and properties should take in effect.
States are variables that hold onto information as long as the page is in session (a state will get erased when the user navigates to another page or reloads).
Let's go over some examples and use cases.
Conditionals on UI Elements: Double click a UI element and you'll notice a "Conditional" tab in the element settings. Here, you can add certain conditions that will affect the UI element. For example, you can add a condition where if the user hovers over this button, the button background should change color. While that's a very basic example, you can now see how conditionals open up huge opportunities for your app. For example, based on a Data Field for a user, you can show different groups, navigation panels, information, etc.
Conditionals on Workflows: When running workflows, you can add "Only when" conditions that must be satisfied before running the workflow. Again, the opportunities are endless here as you can now add a condition on the entire workflow OR individual steps in the workflow. An example would be to only send an email if the Current Date is greater than the expired date for a bid.
States for Navigation: Using states for navigation allows you to build a more seamless experience for your users. Instead of navigating users to different pages, you can use states to show/hide groups. For example, when the user hits the "Settings" menu option, the State of the page "Navigation" should be changed to "Settings," which will in effect cause the Settings group to show and all others to hide.
States for Temporary Storage: Using states for temporary storage is also a great use case. When a user performs an action, you can hold onto information temporarily before creating a new database entry. Or you can just hold onto the information for the time being to eliminate the need of database storage.
As you can see, using Conditionals and States is what makes your app advanced in nature, as you're starting to accommodate increased scenarios and edge cases.
Key to Learn: Understand the difference between conditionals and states, and all their use cases. Try adding some simple conditionals on UI elements, such as on hover effects and certain database conditions. Also, add 'Only When' conditions on workflows to see how you can incorporate specific cases. Lastly, play around with states to understand how their use can benefit you.
Understanding how data is stored and retrieved in respect to UI elements is especially important.
Key to learn: General Bubble navigation and editor. Get comfortable with the layout and where everything is/all the tools provided to you. Next, play around with the UI elements and try fetching data with groups/repeating groups and other elements.
Bonus: API's
API's open your Bubble app to interact with other applications, which in effect open tremendous features and applications for your app.
While API's aren't necessary to getting started with Bubble, we've decided to include them here as they really help if you want to integrate a third-party service.
In Bubble, you'll want to download the "API Connector" plugin, which serves as the main area to work on for API's. While we won't go too deep into this area, it's important to know that API's are rather technical in nature, and there's not much you can do but to understand the technical concepts.
For most API's, the provider should have documentation in which you can look at to understand the various calls, parameters, and authentication needed for successful requests. Our recommendation here would be to watch one of our API tutorials to get a quick look into how to approach integrating an API call.
Key to Learn: How API's could help you with your app features. Understand how to create GET/POST calls. Try picking an 'easy' API call and successfully performing requests with Bubble. By incorporating API calls, you'll most likely use other no code tools as well, which is a great plus.
Getting Started with Bubble - Concluding Remarks
We hope this guide served as a good stepping stone in your journey with Bubble. Our suggestion here would be to take a couple days and look/play around with each of these foundation areas. Once you feel you've 'mastered' the concept, move on to the next area. Once you have a solid understanding of each, you'll be able to account for other situations that arise. Take a look at our Bubble.io blog to read more about Bubble and no code development, and our bubble.io tutorials to learn quick.
The learning curve for Bubble is high, only because of the power and customization that's offered to you. If you'd like to lower the learning curve, we offer 110+ guided tutorials and over 50+ hours of content to get you started building your no-code app quickly. Additionally, we recommend adding Webflow to your tech stack to power your app or businesses SEO. You can look at our main differences between Bubble.io vs Webflow here.
